Soap making is a time-honored craft that combines creativity with practicality, allowing individuals to create personalized products that meet their unique preferences and needs. This art form has gained immense popularity in recent years, as more people are discovering the benefits of making their own soap at home. The process of crafting soap involves various methods, including cold process, hot process, melt-and-pour, and more, each offering distinct advantages. Regardless of the technique chosen, soap making encourages experimentation with ingredients and designs, inviting makers to explore their artistic side.
One of the most appealing aspects of soap making is the opportunity to incorporate essential oils into your creations. Essential oils are concentrated plant extracts that not only impart delightful aromas but may also provide various therapeutic benefits. For example, lavender is often used for its calming properties, while tea tree oil is recognized for its antibacterial qualities. Utilizing essential oils in soap not only enhances the sensory experience during use but also allows for customization based on individual skin care needs. As such, soap making with essential oils can be seen as a holistic approach to personal hygiene.
In this guide, readers will receive a comprehensive overview of soap making, from selecting the right ingredients to understanding the essential tools required for the process. Aspiring soap makers will gain insight into the importance of proper measurements, safety precautions, and the various stages involved in crafting a high-quality bar of soap. Additionally, the following sections will delve deeper into selecting suitable essential oils, preserving their properties during the soap-making process, and tips for successful experimentation. Engaging in soap making not only nurtures creativity but also fosters a greater connection to the products we use on our skin, promoting a sense of self-sufficiency and well-being.
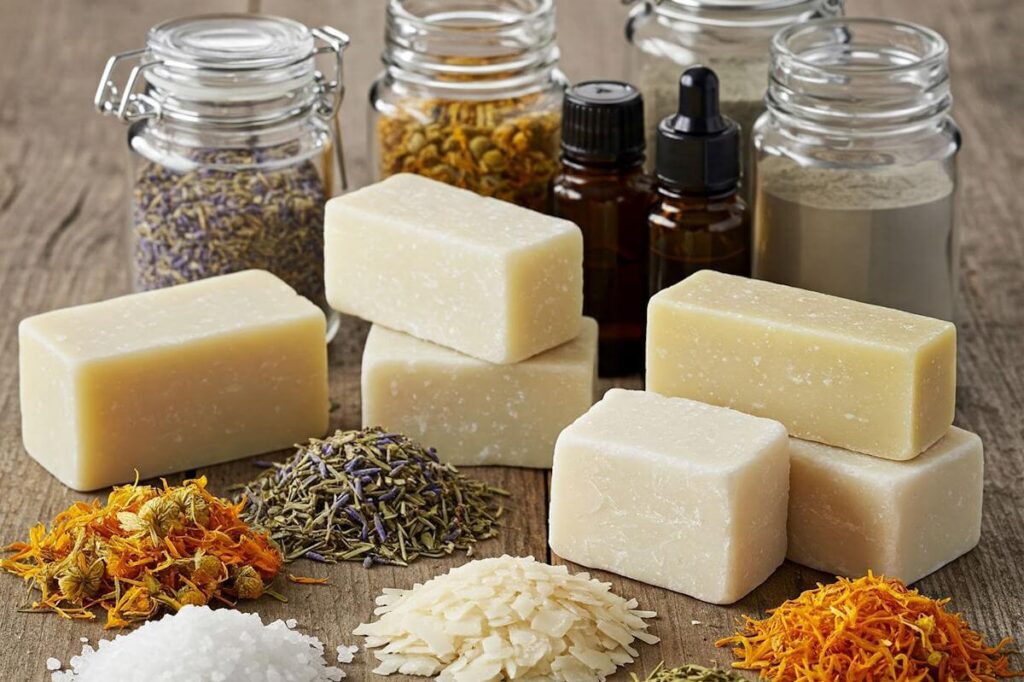
Materials and Ingredients Needed
Creating soap with essential oils involves an understanding of both the materials and ingredients essential for a successful outcome. The process begins with the primary ingredient: lye (sodium hydroxide). Lye serves as a crucial component in the saponification process, allowing fats and oils to chemically react and produce soap. It is imperative to handle lye with utmost care, as it is caustic. Safety gear, including gloves, goggles, and a well-ventilated space, is essential when using this chemical.
The next important element is water, which facilitates the mixing of lye. It is recommended to use distilled water to prevent impurities from affecting the quality of the soap. Following this, various base oils can be selected, each contributing unique attributes to the final product. Common base oils include olive oil, coconut oil, and palm oil. Olive oil adds moisturizing properties, while coconut oil creates a fluffy lather. It is advisable to use a blend of different oils for well-rounded results.
Equally important are the essential oils themselves, which infuse the soap with fragrance and may offer therapeutic benefits. Popular choices include lavender, tea tree, eucalyptus, and peppermint oils. These oils not only enhance the sensory experience but can also impart various properties; for instance, tea tree oil is known for its antibacterial effects.
In addition to these key ingredients, having the correct kitchen utensils is vital. Essential tools include a digital scale for precise measurements, mixing bowls, a stick blender for emulsification, and a thermometer for temperature regulation. Special soap molds are also recommended to shape the finished soap into desired forms. Optional additives, such as colorants or exfoliants, can provide personalized touches to the soap-making process.
Safety Precautions
When embarking on the process of soap making, particularly with the use of essential oils, it is crucial to prioritize safety at all times. The primary concern arises from the use of lye, a caustic substance that can be hazardous if mishandled. Therefore, one of the fundamental safety measures is to wear appropriate protective gear. This includes gloves and safety goggles, which safeguard against burns and irritation that may occur from direct skin contact or splashes.
In addition to protective gear, ensuring proper ventilation in the workspace is vital. Working in a well-ventilated area helps to dissipate any fumes released during the mixing of lye and oils, reducing the risk of inhalation. If possible, it is advisable to conduct the soap-making process outdoors or near a window that can be opened to promote air circulation. Ensuring that the workspace is organized contributes significantly to safety. Keeping all ingredients, tools, and equipment neatly arranged minimizes the potential for spills or accidents.
Handling lye requires a cautious approach. Always measure the lye first before adding it to water, never the other way around, as it can lead to a dangerous reaction. If any accidental spills occur, it is essential to have a neutralizing agent, such as vinegar, readily available to manage minor incidents. In case of a lye-related emergency, such as exposure on the skin or in the eyes, it is important to rinse the affected area immediately with copious amounts of water and seek medical attention promptly.
By implementing these safety precautions, individuals can confidently engage in the soap-making process. Remember that a vigilant approach to safety not only protects the individual but also contributes to a successful and enjoyable undertaking in creating soap infused with essential oils.
Understanding the Cold Process Method
The cold process method is one of the most popular techniques employed by hobbyists and artisans when it comes to making soap. This method involves the combination of oils and a strong alkaline solution, typically sodium hydroxide, which initiates a chemical reaction known as saponification. During saponification, the fats and oils react with the lye, resulting in the formation of glycerin and soap. This unique transformation is what makes the cold process method particularly fascinating, as it allows for the creation of high-quality, natural soap bars.
One of the primary advantages of using the cold process method is the level of control it grants over the ingredients. Soap makers have the freedom to select specific oils, butters, and essential oils, tailoring recipes to meet individual preferences or skin types. This creates opportunities to explore various scents, textures, and qualities, making every batch of soap a unique creation. Additionally, essential oils can be incorporated at various stages in the process, allowing for enhanced scent profiles and potential therapeutic benefits associated with aromatherapy.
Furthermore, the cold process method is known for producing soap that retains the beneficial properties of its natural ingredients. Unlike some commercial soaps that may go through excessive heating or refining, cold process soap preserves the essential nutrients found in oils and botanicals. As a result, the finished product is often gentler on the skin and is better suited for those with sensitivities or allergies to synthetic additives. Overall, the cold process method not only empowers creators to craft bespoke soap bars but also ensures a product that is rich in quality, nourishing, and appealing to a wide audience.
Step-by-Step Soap Making Process
Soap making is an engaging and rewarding process, particularly when incorporating essential oils that impart delightful fragrances and potential therapeutic benefits. The following is a comprehensive guide to the essential steps involved in creating your own soap at home.
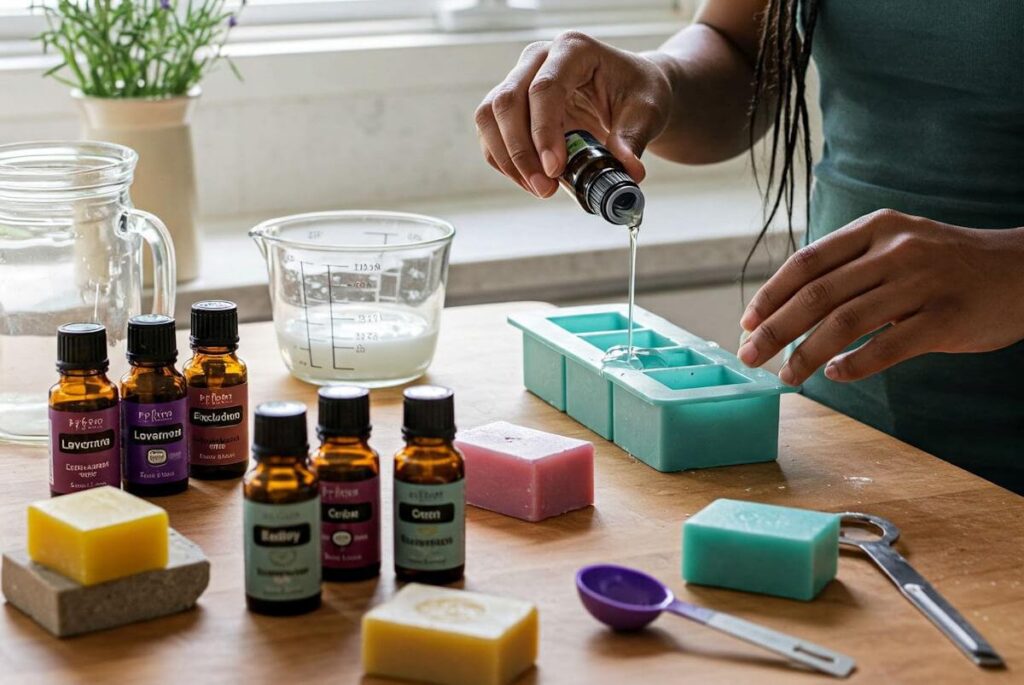
The first step is to prepare the lye solution. This involves carefully measuring sodium hydroxide (lye) and water. It is crucial to use distilled water to ensure that impurities do not interfere with the soap’s chemical reaction. Slowly add the lye to the water (never the other way around) while stirring continuously until fully dissolved. Allow the mixture to cool to a temperature that is safe for further processing, typically around 100-110 degrees Fahrenheit.
Next, prepare your oils. You will need a combination of oils such as olive, coconut, or palm oil, each contributing unique properties to the final product. Measure the oils and gently heat them in a separate container until they reach a similar temperature to the lye solution. Once both components are at the appropriate temperature, slowly combine the lye solution with the oils, stirring continuously.
After combining, use an immersion blender to mix until “trace” is achieved. Trace is indicated when the mixture thickens and leaves a trail on the surface. This is the ideal moment to add your selected essential oils. Including essential oils at this stage ensures that their fragrances and beneficial properties are preserved. Mix thoroughly but gently to avoid incorporating too much air.
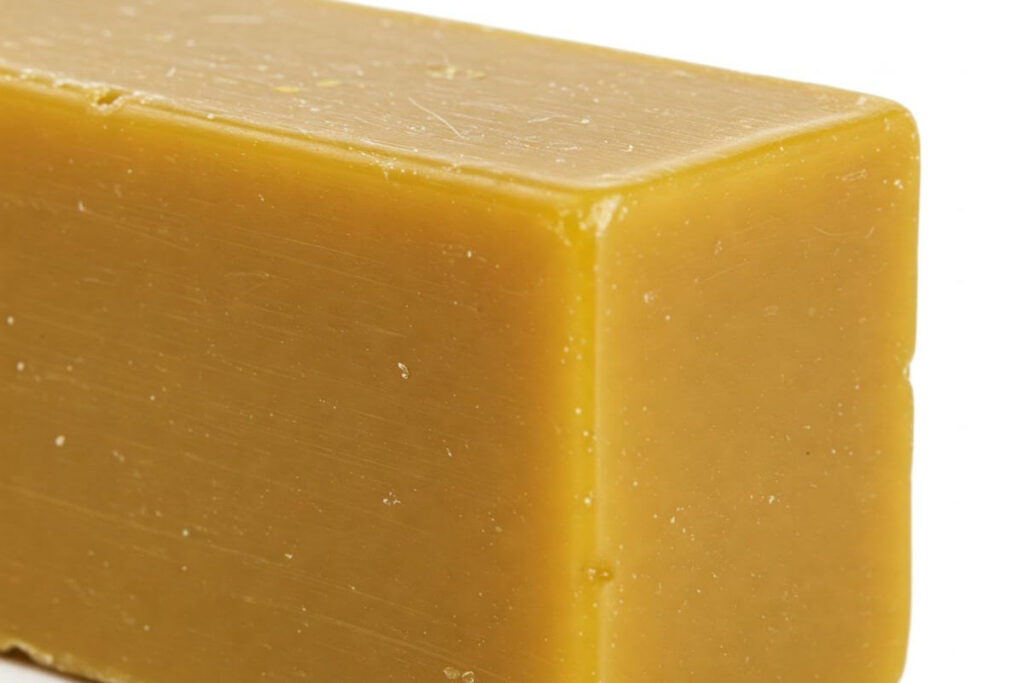
Once the essential oils are blended sufficiently, pour the soap mixture into prepared molds. It is advisable to tap the molds lightly to eliminate air bubbles. Cover the molds with a cloth to retain heat while the soap saponifies, which usually takes 24 to 48 hours. After the soap has set, remove it from the mold and cut it into bars, allowing them to cure for an additional 4-6 weeks. This curing phase is important, as it lets the soap harden and become milder.
With these steps completed, you have successfully made soap with essential oils. The process requires attention to detail and care, ensuring a fragrant, nourishing product tailored to personal preferences.
Choosing the Right Essential Oils
When it comes to making soap, choosing the right essential oils is crucial for both aroma and skin benefits. Essential oils are concentrated extracts from plants, capturing their natural fragrance and therapeutic properties. The first factor to consider is fragrance strength, as different oils have varying intensities and volatilities. Some oils, such as lavender and peppermint, provide strong scents that can overpower other ingredients, while lighter oils like citrus tend to dissipate quickly. Therefore, it is essential to balance strong and subtle scents to achieve a harmonious blend.
Another vital consideration is the skin benefits associated with particular essential oils. For instance, tea tree oil is well-known for its antimicrobial properties, making it an excellent choice for acne-prone skin, while chamomile essential oil is celebrated for its soothing qualities, perfect for sensitive or irritated skin. Researching the specific benefits of each oil can help you select those that align with the skin concerns you aim to address in your soap products.
Potential allergic reactions are also a significant factor to bear in mind. While essential oils are natural, they can still trigger sensitivities in some individuals. It is advisable to perform a patch test before using a new oil extensively. Additionally, consider blending different essential oils to create unique scents that elevate your soap’s appeal. Popular combinations include lavender and bergamot for a calming effect or eucalyptus and tea tree for a refreshing, invigorating aroma. Experimenting with combinations will provide opportunities to tailor soaps that are not only scented but also beneficial for the skin. Ultimately, making informed choices will guide you in the right direction toward crafting delightful, effective artisanal soaps.
Curing and Storing Your Soap
After the initial process of soap making, the curing phase is a crucial step that should not be overlooked. Curing allows the soap to harden and aids in the complete saponification of the fats and oils used in the recipe. Typically, the curing process lasts from four to six weeks, depending on the ingredients and the conditions in which the soap is stored. During this time, the soap undergoes chemical changes that improve its overall quality, texture, and longevity.
To achieve optimal results during the curing phase, it is essential to place the soap in a cool, dry area with good air circulation. Elevated temperatures or humidity levels can adversely affect the curing process and may lead to a less than satisfactory final product. A dedicated curing rack or a well-ventilated box can greatly assist in ensuring that air flows freely around the soap bars, preventing the formation of moisture, which fosters undesirable mold growth.
One effective way to determine if the soap is ready for use is by conducting a simple pH test. Ideally, the pH levels of the finished soap should be between 7 and 10, indicating that saponification has taken place and that the soap is safe to use. Additionally, checking for a firm texture and a lack of wetness can help you ascertain the readiness of the soap.
Proper storage of the cured soap bars is vital to extend their shelf life and maintain their quality. Opt for a cool, dark place, away from humidity and direct sunlight. Wrapping the soaps in breathable materials like parchment paper is advisable, as this prevents them from absorbing moisture while allowing any remaining volatile substances to dissipate. Following these guidelines ensures that your homemade soap retains its advantageous properties and aromatic benefits well into the future.
Troubleshooting Common Issues
When embarking on the soap-making journey, especially with essential oils, it is not uncommon to encounter various issues that can thwart your creative process. Understanding how to troubleshoot these common problems is crucial for achieving satisfactory results. One common issue is the improper dissolution of lye. To avoid this, ensure that you are using the appropriate temperature for your water and lye mixture. Typically, lye should be added to water, not the other way around, to ensure proper dissolution. If you notice undissolved lye in your mixture, gently heat it while stirring to help it dissolve completely.
Another frequent challenge faced by soap makers is the soap not hardening correctly. This could be due to various factors, such as insufficient lye or excessive moisture in your mixture. To address this, verify your lye calculations to ensure that the proper amount was used. If your soap appears overly soft or still ‘sabulent’ after the usual hardening period, consider placing it in a warmer environment or increasing the curing time. You may also experiment with adding more hard oils, such as coconut oil or cocoa butter, to your recipe to promote solidification.
Discoloration in soap is another issue that can diminish the final product’s aesthetic appeal. Essential oils can sometimes cause discoloration due to their chemical properties. To minimize this effect, select oils that are known for their stability or incorporate natural colorants. If discoloration occurs despite your best efforts, remember that this is often a visual effect and does not typically impact the soap’s quality.
Lastly, should you find yourself dealing with any mishaps in your soap-making endeavor, it is important to remain calm and assess the situation. Many issues are salvageable through various techniques, such as re-batching or rebatching your soap, which can help restore its quality and integrity.
Creative Ideas for Customizing Your Soap
While essential oils are a wonderful way to infuse your soap with delightful scents, customizing your soap can extend well beyond fragrances. There are numerous ways to personalize your soap-making experience by integrating various natural ingredients and decorative techniques that can enhance the visual appeal and overall enjoyment of your creations.
One popular method of customization involves adding natural colorants to your soap mixture. These colorants can include ingredients such as beetroot powder for a vibrant red, turmeric for a warm yellow, or spirulina for a beautiful green hue. Not only do these options provide an aesthetic lift, but they also introduce additional natural properties to the soap. Experimenting with plant-based colors allows for unique shades and combinations, giving each bar a distinctive character that can be tailored to your preference.
Incorporating herbs and botanicals into your soap is another excellent way to customize its properties. Dried lavender buds, oatmeal, or chamomile flowers not only contribute texture but also enhance the therapeutic benefits of your soap. Such additions can create a gentle exfoliating effect or provide a soothing aroma that complements the essential oils. Furthermore, blending different herbs can yield varied textures and scents, allowing you to create truly one-of-a-kind bars.
Moreover, decorative techniques can elevate your soap’s aesthetic, turning them into artistic pieces. Techniques such as layering different colors, creating swirls, or embedding small decorative shapes can add depth and intrigue to the appearance. You might also consider using silicone molds to craft unique shapes that align with seasonal themes or personal celebrations.
With these ideas in mind, soap-making transcends just a craft; it becomes a creative outlet. We encourage you to experiment with these suggestions and explore your own ideas, transforming ordinary soap into extraordinary personalized pieces. Share your unique recipes and creations with others to inspire a community of fellow soap-makers.